The Nuisance Of Link Surfing
 |
| Photo by mikael altemark. Some rights reserved. Source: Flickr |
This essay's going to be rather short, so I'll just cut to the chase. An awful habit is developing among the essays, articles, blogs, op-eds, or whatever you want to call them, on the Internet. Allow me to explain. Say you are reading an article about the history of the peanut butter and banana sandwich, when the author of said piece, claims that the popular dish was invented by Elvis Presley. Instead of detailing where they found this fact, or giving us the passage, they hyperlink the statement to their source. Confronted with this, you can either click on the hyperlink to verify the truth of their claim, or you can trust them to be honest and not bother. Of course, no one on the Internet can be trusted these days, so you click, but when to click? Do you click immediately and interrupt the flow of the article or wait until you finish the article, while it dangles among the sentences, tantalizing you. Eventually, when you do click, 9 times out of 10, you reach another Internet source, and 9 times out of 10, they'll have numerous claims where the hyperlinks abound. This eventually becomes a rather time consuming and irritating game, chasing source after source in search of the original. It may take hours, and by the time you finish, you may have forgotten what the original article was about.
I like to call the cat-and-mouse that many news junkies are familiar with, "link-surfing." Unfortunately, I can't say that I coined the term, because Urban Dictionary thought of it first, "link surfing: Traversing the Web by clicking on links within web pages. This technique is often used on encyclopedia sites like Wikipedia" (Gunderson). If only this habit could be regulated to websites like Wikipedia, but alas, it has infected the annals of our best magazines and newspapers. Since people prefer to get their information for free (I sure do) I imagine that much of the press is gearing themselves towards an Internet audience. As such, they no longer bother with quotes or paraphrases. You're expected to either follow the link or take them at face value. This, with all due respect, comes off as lazy. This type of format certainly isn't admissible for college papers or non-fiction Pulitzer Prize winners. I've always believed that a text should be self-contained. All the relevant information necessary to understanding the point of your piece should all be within the text itself. Your sources should be appendices to your arguments. Following all those links to verify the correctness of your claims is simply too much work for the average reader to do in one sitting. Some of us have lives outside of the Internet. We can't be bothered to go link-surfing all day. I don't know if these Internet writers actually expect us to click on all of their links. In a way, their professionalism is appears as not much different from the rumor mill.
By the way, I often find that some of these links are ultimately useless. They may lead to magazine that requires a subscription, or an academic study that requires a subscription, or an Error 404, or a Wikipedia article. Some of you may wonder why I listed the Wikipedia article as useless. Well, to its credit, the free encyclopedia has plenty of information and sources listed. In my opinion, the website's entries are only useful insofar as you are able to check their sources. Some require that you go to the library, while others are dead links or uncheckable. Checking the links, again, takes up too much time, and knowing that Wikipedia can be edited by anyone, its claims deserve the highest scrutiny. Will we really be able to verify each and every claim? In other words, not a very reliable source.
This may sound a bit old-fashioned, but I call for an appeal to the past. I realize that not every single claim made needs to be referenced or footnoted, but the big ones do. For those big ones, don't cheapen yourself by only linking the words to another site. Quote or paraphrase it, like you were taught. If you can't find it on the Internet, then fine, source a book if you must. I understand that Internet connection has made information a lot easier to find, and that's a good thing. However, save the rest of us some time, and muscle up your arguments inside of the text, instead of relying solely on links, that frankly, most of us won't even bother to click on. Also, don't source Wikipedia. That makes you look like a slacker.
Bibliography
Gunderson, Bob. "link surfing." Urban Dictionary. May 1, 2007. Web. http://www.urbandictionary.com/define.php?term=link%20surfing
Goblyn Head Press News
You may or may not know this, but I own a very small game publishing company. How small? Well... so far we have produced exactly three items for sale, and all of those have been released in the past month.
To date, Goblyn Head has produced a supplement for D&D 5e, and adventure for 5e, and a generic map of a barrow mound that is free to download ("Pay What You Want"). All are available from DriveThruRPG here.
Come check it out! Zeebs (our mischievous but friendly goblyn mascot) will show you how to go. And if you do pick up something, please leave a review!

Testing Esoteric Lists: Gunny & Madrak2

Last night I was able to get an astounding two games in and as I was heading to my FLGS I decided I didn't want to just run the popular pairing of Madrak1 and Borka2, mainly because I've played a ton of Madrak1 already and while Borka2 is fairly new for me I have had a few rounds with him already. I just wanted to try some lists that were of my own design that I thought were interesting and possibly strong.
So in I went with a "pairing" to put down into whoever I was playing against: Gunnbjorn and Madrak2.
I'll tackle each list and the match up in turn.
Gunny
Trollblood - Gunny Goes North
Theme: Storm of the North
2 / 2 Free Cards 75 / 75 Army
Captain Gunnbjorn - WB: +28
- Trollkin Runebearer - PC: 0
- Dozer & Smigg - PC: 18 (Battlegroup Points Used: 18)
- Dire Troll Bomber - PC: 19 (Battlegroup Points Used: 10)
- Dire Troll Mauler - PC: 15
Hearthgut Hooch Hauler - PC: 18
Bog Trog Mist Speaker - PC: 4
Valka Curseborn, Chieftain of the North - PC: 0
Krielstone Bearer & Stone Scribes - Leader & 5 Grunts: 9
- Stone Scribe Elder - PC: 3
Northkin Raiders - Leader & 9 Grunts: 15
Swamp Gobber Bellows Crew - Leader & 1 Grunt: 2
I was really excited about this list since it seems like it can clear a lot of infantry off the board or shoot a heavy off the table. I've been dying to find a way to make the module of Hauler + Raiders work, and I feel giving them Snipe via Gunny or Grim2 is the way to really make them shine.
I put this pair up vs. my friend Brian who was coming back to playing Khador after 8 months of playing Circle and a lot of other games. He had Butcher3 with Jacks Galore and a Zerkova 2 list with lots of Greylords and a smattering of Doom Reavers. I really wanted to try Gunny and on discussion of the matchup it was clear that Zerkova 2 would get shot down pretty hard on the approach before she could really do any damage, plus most of my army is going to be Cold Immune, meaning he had to drop Butcher. Madrak is probably the better Butcher3 drop, but I wanted to see how Gunny would match up.
Brian's list from memory was roughly:
Butcher 3
-Wardog
-Berserker
-Berserker
-Ruin
-Grolar
Forgeseer
-Behemoth
Forgeseer
Eliminators
Eliminators
Mechanics
Brian won the roll off and elected to go first. Scenario was Outlast.
After running his army into position up the field on turn 1, I replied by feating early to avoid the Behemoth clearing out swathes of my Raiders and running to be just out of Brian's threat ranges.
Thanks to Dozer's animus I was able to get lucky drifts/boosts onto one member of each unit of Eliminators and take their gang bonus off the table. Still I was being a bit too timid by staying out of his threat ranges and I had blocked up my Hooch Hauler behind my Raiders making the order of activation awkward on this and the following turns.
On Brian's second turn he simply positions to threaten the entire zone and moves Butcher on to the central flag on his side. He moves Ruin into some rough ground for cover and positions both Argus centrally to threaten as well.
Madrak2
Trollblood - Madrak2 Toughallo
Theme: Band of Heroes
3 / 3 Free Cards 74 / 75 Army
Madrak Ironhide, World Ender - WB: +28
- Trollkin Runebearer - PC: 0
- Dire Troll Mauler - PC: 15 (Battlegroup Points Used: 15)
- Dire Troll Bomber - PC: 19 (Battlegroup Points Used: 13)
Fell Caller Hero - PC: 0
Fell Caller Hero - PC: 0
Eilish Garrity, the Occultist - PC: 5
Krielstone Bearer & Stone Scribes - Leader & 5 Grunts: 9
- Stone Scribe Elder - PC: 3
Trollkin Long Riders - Leader & 4 Grunts: 20
Trollkin Long Riders - Leader & 4 Grunts: 20
Kriel Warriors - Leader & 9 Grunts: 11
I was/am really excited about this Madrak2 list. My initial thoughts with the caster is to pretend I'm a MK2 Cryx player and jam in 2x Fennblades + 2x Kriel Warriors + solos and run screaming at my opponent.
Then I got to thinking about how while other warlocks can deliver units like the Long Riders, a unit I absolutely adore, no one really makes them hit any harder and while they're very strong, they're not going to just blow up a heavy without any buffs. Plus the problem with a 40+ dude infantry swarm with Madrak2 is it lacks basically any relevant guns and it's not very hard for enemy shooting to continually clear off my infantry. Once the Fennblades have been hit, the Kriel Warriors will get out paced and likely shot up pretty hard. This would turn things into a game of "Who won to go first".
With the Long Riders I should still be able to chew through enemy models and also withstand enough shooting to do serious damage once the lines meet. Initially the list had two units of Kriel Warriors to back up the Long Riders, but I decided the list was susceptible to control and I threw Ellish in. With the extra points I upgraded my Earthborn to a Bomber to get some ranged presence which I really found to be helpful.
I played this list into Sean, someone who I've met but haven't played against. He dropped Skarre1 Dark Host into me:
Skarre1
-Scarlock
-Inflictor
-Stalker
-Stalker
Wraith Engine
Bane Riders
Bane Knights
Min Bane Warriors + CA
Darragh
Necrotech
Tartarus
Scenario was Standoff and Sean won the roll to go first.
This game ended up being a bit of a back and forth with some key positioning elements due to equivalent threat ranges on our Cav and my spacing models out properly to avoid a Stalker being able to kill multiple Long Riders without issue.
I won the game in the end, but part of that could have been due to the fact that Sean had deployed Darragh with the infantry units on the flank opposite the Bane Riders, so we shared a threat range rather than him having an advantage. He also apparently didn't know that Long Riders could slam models, and so I was able to eliminate all of his Bane Riders in exchange for sacrificing only one of my Long Riders. It should be noted that Blood Fury'd Bull Rush slams, when knocking the slam target into another model or terrain is very strong. Still Sean was very careful to only feed me feated on Bane Knights for my feat turn, and spaced appropriately with his other units in reserve to prevent me from getting too far ahead on attrition. I suspect if we played again this game would be much tougher and far more favored to the player who wins the roll to go first based on how each of our lists were designed.
I know I could play this list in Storm of the North to get extra speed on my units, but I think having Band of Heroes for the extra 2" and Takedown/RFP is absolutely crucial in the meta ATM. Right now Trolls are balanced in that we can either speed up our Long Riders or we can buff their damage, but we can't do both. I do think the unit has a lot of untapped potential, and since I own two units of them now, I want to experiment a lot with them.
Conclusions
After both games I am more optimistic about Madrak2's list than I am about Gunny. I am not sure how I feel about leading with my Cav up front, but I do know that making Long Riders weapon masters makes it so that they can easily kill any heavy on the charge with the usual amount that can get into one via positioning rather than not. They also are fairly well positioned to be able to handle infantry due to Bull Rush.
As for Gunny, I think he just needs more testing. It may well be that what I have is sufficient, but man does it ever feel like having just more units to be able to throw into zones is the way to go. Melee also just feels much stronger than guns at being able to do what is necessary: Jam up and piece trade, so as to allow Trolls the ability to play the Attrition game we're supposed to be very good at. Guns still have a lot of value, but it's more about being able to snipe out a key model in a zone or scalpel out an important support solo or CA/WA/etc.
Still, I really want to find a way to make the Hauler + Raider package work well, it just seems like it should be so good on paper. I believe Grim2 is the next place to look with them, but I'm having trouble rounding out a SotN list that I like that includes that module.
Slowly Getting Back To 'Normal'
A bit of painting, a quick solo game, aced the Beef and Broccoli for supper, Hornblower: The Duchess and the Devil with my closest canine friends.......that's retirement!

Storium Basics: Wild Cards
Welcome back to my series on Storium basics. Today, we'll be discussing Wild Cards.
When you create a character, you start with a defined Strength and a defined Weakness. Usually you'll start with more than one copy of each, making it your character's strong theme - the amount can vary depending on your game's settings. However, in addition to those, you'll also usually start with a few wild cards - some Strengths, and some Weaknesses.
These are how Storium handles the mechanical side of character development.
Wild Strength and Wild Weakness cards are Storium's way of letting you develop your character and reveal new traits about them. When you pick one, Storium will ask you to title it and write a description for it, just as if you were creating custom cards during character creation. You can also select from other cards the narrator had as options for character creation, or from cards you've already played in the game.
Which should you do? Well, that's up to you.
Early in the game, it's probably best to either pick another card from the character creation list that seems to apply to your character, or write a custom card.
Picking another card from the list is pretty simple - just find one on the "Existing Cards" list and select it. Make sure to pick something that feels like it applies to your character - something that fits with your concept.
My preferred method, though? I prefer to write my own Wild Cards. Once you've started the game, you're probably starting to develop your character's identity and traits in your head. The other existing cards might apply, but I tend to find that only works for one additional card, two tops. To really reveal who my character is, I find it's best to write up some custom cards.
It's also lots of fun.
When you're writing a new card, what you want is to aim for something that feels broad but still descriptive. Strengths and Weaknesses in Storium work best when they can apply to a wide variety of situations, but they still need to say something specific about your character. Not that you can't use very specific facts from time to time, but overall, I find it easier to write things you can use again and again. For more on that, see the links below.
The other thing you want to do here is say something new about your character. Something that spins off of what we know about them, but that is different in some way from what we knew before. You'll get the most fun out of Wild Cards if they differ from cards you've already played. They can be similar, but there should be differences. As an example, if your original Strength card was something like Brilliant, reflecting your ability to use intellect to find a way through your problems, maybe your new Strength might be something like Lateral Thinking, reflecting a particular and unusual strategy that allows you to find creative solutions, or Multitasking, reflecting your ability to split your brainpower to handle multiple tasks at once. They still relate to your intellect, but they tell you something new.
Now, it doesn't have to be that direct of a link all the time, but it's important to try to link Wild Cards to your character concept. You're describing new elements of your character, but they shouldn't (generally) feel like they come entirely out of nowhere. Build on what you've done so far or formalize traits you've hinted at in the past. There may be times where it's appropriate to reveal a totally surprising character element, but done improperly, or especially done too often, it ends up just feeling like bad writing. So: Tell us something new about your character, but not something outlandish about your character. In general.
Late in the game, when you've already made a lot of wild cards, you may find it easier to start using the "Previously Used Cards" tab to select cards you've played earlier in the game. In the late game, you've already got a pretty decent list designed and it may be hard to think of new traits for your character. That's when I find it handy to sometimes use this list and just bring another of my existing traits to the fore. In the early game, there's just not enough on this tab and using it will stop you from adding new traits to your character - but in the late game, it can be very handy.
Whatever you do, you'll then play that card just like any other card - write your move according to the traits you've revealed. Once you've written the card, there's nothing particularly different about using it than using other cards.
At Refresh (more on that next week), any wild cards you've played will show up with their names and descriptions as options you can choose. This is how you can change your character's primary, noted traits over the course of a game. A paladin who starts out with Toughness as his starting Strength may turn out to concentrate on Inspirational Leadership and Empathy by the end of the game - so Wild Cards don't just let you reveal new things about yourself, they can ultimately let you change your character in accordance with the story.
For more on Wild Cards and writing Strengths and Weaknesses, see these articles:
Op Compass Game 7 - Sandstorm

Lumbering Matildas slowly crossing the Desert whilst sand swirls around the troops as they advance into the unknown, would adequately describe Game 7 of our ongoing Op Compass Campaign and what follows is the Scenario and AAR.
 |
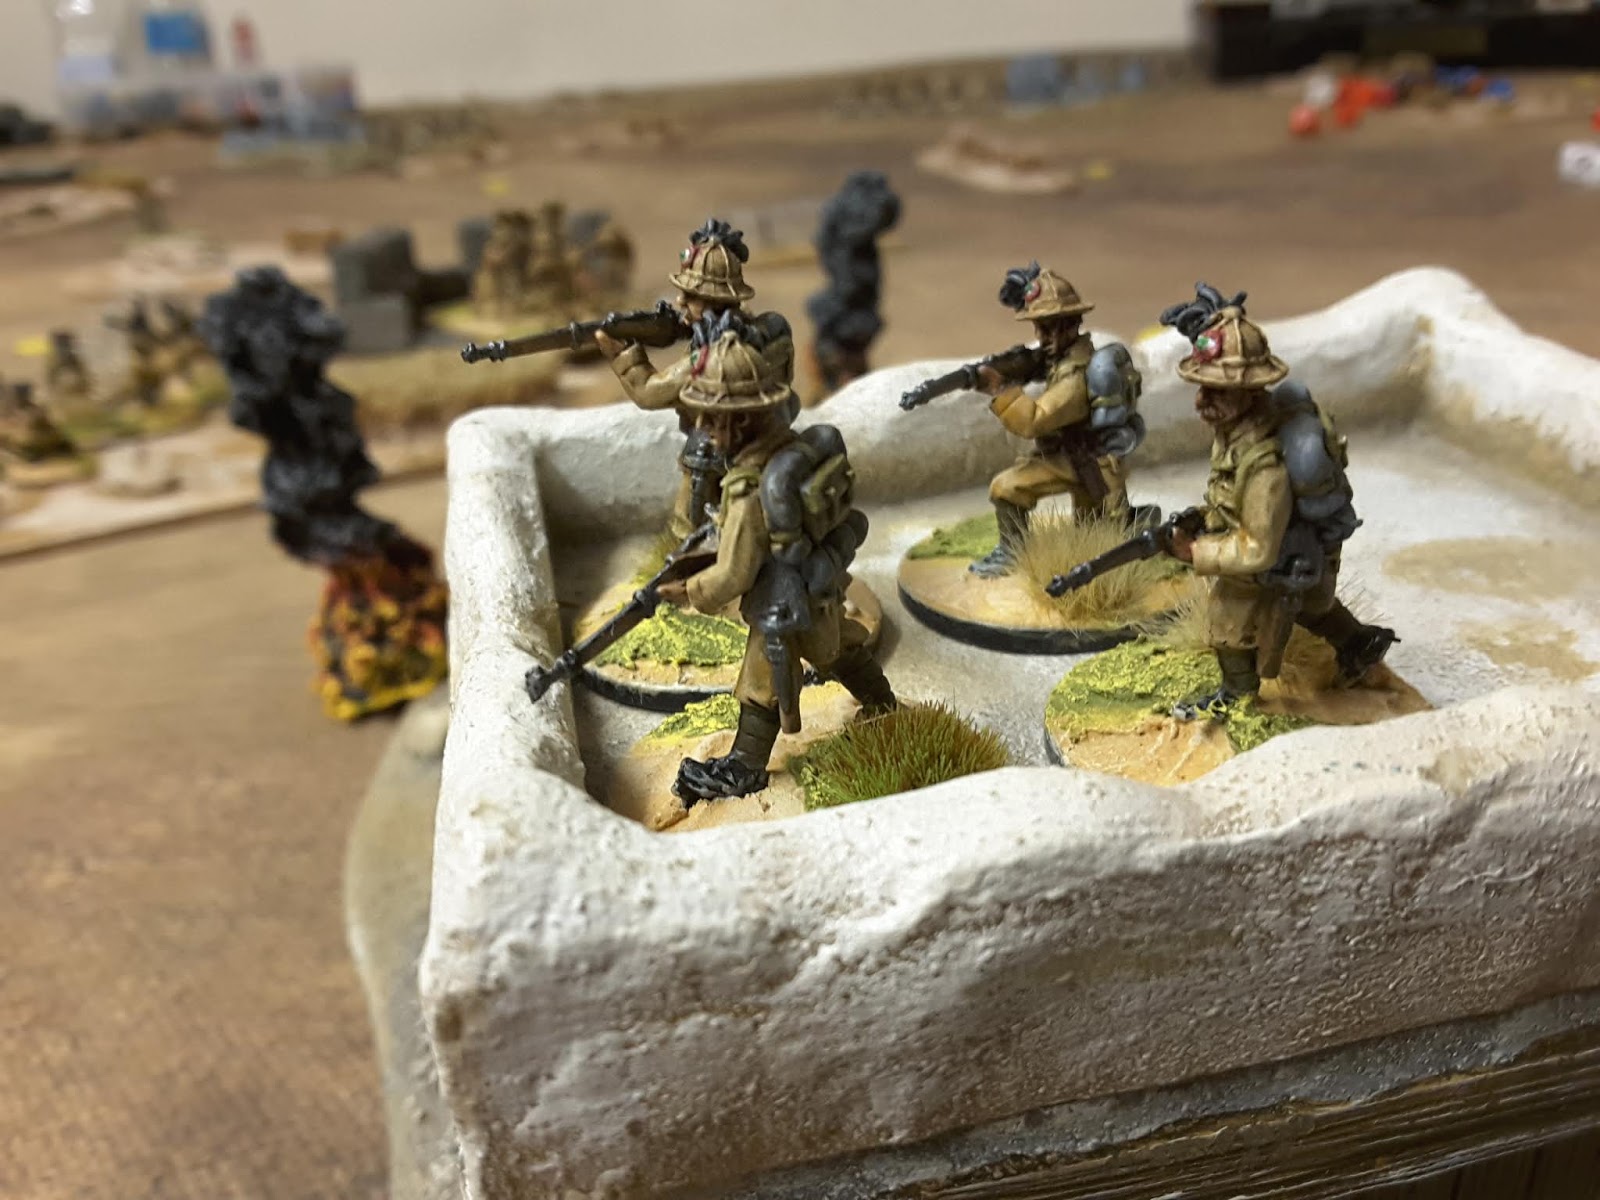
| Italian troops wait for something to emerge from the Sandstorms |
https://yarkshiregamer.blogspot.co.uk/2018/04/opcompass-1940-resource-page.html
The games are based on an excellent book by Robert Avery which is available from The Toofatlardies, there is a direct link to purchase the book on the Resource Page.We use 28mm figures with this scenario taking place on an 8 x 6 table using a home brew set of rules, based on Iron Ivans Disposable Hero's.
 |
| Ratty and Mole discuss their latest adventures |
Its the 10th December 1940, the previous day (see our recent games) the Italian Forts at Tummar fell, the British Forces moved onto the Sidi Barrani position. Part of the force was detailed to take a small hamlet known as Alam el Dab.
The weather was appalling, a high wind whipping up sand and dust into a constantly changing fog / sandstorm, visibility rapidly changing minute by minute. As the British advanced the cloud of dust lifted long enough for the Italian Artillery to destroy the approaching lorries, the British Infantry helpless, only able to watch as their lift home disappeared.
 |
| Italian 75mm Field Gun |
Table Set Up and Terrain
This battle is fought over an 8 x 6 table. The game begins with the Italian positions hidden.
 |
| Table Set Up |
The following Special Rules are in force (see Resource Page for full details),
Difficult Going and Breakdown.
New Rule - Variable Visibility - to represent the fluidity of the distance troops could see in this battle Visibility is limited to 9" plus 1d10 inches. Visiblity is determined once at the start of a new turn and again on the turn of an event card, giving a maximum of 3 and a minimum of 1 change in Visibility per turn. Whilst in force all firing is considered to be at long range.
Spoiler - The Brits have a secret objective, the game ends when they take all three gun positions, the British players should not know this until the game ends.

British Briefing
Italian Artillery has once again proven it's worth, take you troops into the mist and capture their positions. Be careful, the sand is soft, our tanks break down and visibility can change at any time.
Best suited for 3 players. Each Task Force has the following,
1 x Matilda Infantry Tank
1 x British Infantry Company consisting of,
HQ Section with 1 x Officer, 1 x Radio Operator and 1 x Sgt with SMG
Support Section with 1 x 2 man 2" Mortar Team and 1 x 2 man Boyes AT Team
3 x Infantry units of 1 x Sgt with SMG, 1 x Bren Gun and loader plus 7 Privates with Rifles
So 3 tanks and 111 men to get the job done. One TF will start in the centre of the table whilst the others will start equidistant from the centre tank and the table edge.
 |
| Advance into the unknown |
Once again you find yourself trapped in a difficult position with the seemingly unstoppable Matildas heading towards you. This time you have the advantage of cover and limited Visiblity, hold on as long as you can and cause as much casualties to the attackers as you can. Defend your guns to the last.

Your forces consist of,
1 HQ Section of Officer and Radio Operator
8 "Blackshirt" units each with 1 Sgt with SMG, 1 x 2 man LMG Team and 7 Rifles.
1 x 65mm Gun and 3 crew
1 x 75mm Field Gun and 4 crew
1 x 100mm Field Gun and 4 crew.

The above photo shows the layout of the Italian positions, only place the terrain and troops on table once they are visible, the Italian player chooses where in the line their three gun pits go.
The position was a series of fox holes rather than a formal trench system hence the use of barbed wire. The Italian positions are static and could easily be played by an umpire or as a solo game.
Italian Artillery can fire over open sights at any target they can see, if they have no target they will fire at random. Dice for one of the 12 squares on the British side of the table, take the centre of that square as the aim point and then randomly deviate by 2 x d10 inches, reroll for each gun.
 |
| Italian AT Gun pretending to be a 65mm Gun behind a Renaissance Gabion, it's all accurate |
Once again a good time was had by all, these scenarios really throw up some interesting match ups and with the randomness of the rules players are definitely kept on their toes. The Visablity rule worked really well and we all got the feel of a swirling sandstorm with targets frustratingly appearing and disappearing usually at the most inappropriate moment.
 |
| It's broke Sir |

The game settled down into a now you see it now you don't gun fight with the variable Visibility, the Brits taking quite a few casualties from the Italians in their fox holes and the randomly landing Artillery.

Things were going well until the tank Gremlin struck again, this time it was Mole in the centre of the attack, who broke down, it was fixable but with Italian small arms easily in range no one was getting out to fix it ! With the Artillery falling else where Mole quickly became a Pillbox, if only it had an AP round.

With the tank stalled, the British went headlong with fixed bayonets into the Italian positions. The Blackshirts held firm and held their fox holes, just.

But the fight drastically reduced the numbers of the defenders and next turn a fresh wave of British troops took the position.
The elation was short lived as the extra move forward revealed more Italians in the Hamlet.

On the British right the last mobile Matilda "Ratty" kept it's slow but seemingly unstoppable crawl towards the wire in front of it, rifles and LMG fire isn't much use against an Infantry Tank.

The Brits in the wire wisely decided to move away from the Hamlet and charged one of the Italian Gun positions, it fell but not without a fight.

The Italian Commander was busy on the radio, but no help came.

On the British left the tankless ("Hedgehog" smoking in the background) company had been wandering around blind for some time, the sandstorm preventing it from seeing anything of value, gradually the advance revealed that the Italian positions were not a straight line and the units moved to engage the flank positions.

The game built up to a nice close, the British had broken into the Italian positions in one location and a couple of others were holding on, however they had taken some pretty heavy casualties, three units had already been wiped out and it was touch and go if there was enough men left to do the job.

Everything came to a head in the final turns, on the right "Ratty" rolled over one of the Italian positions and with the gun position next to it taken that side of the table was taken.

In the centre there was another bayonet charge and again the first unit was wiped out at the wire whilst the remnants of the second one taking the position.

Whilst on the flank the British managed to roll over the 100mm Field Gun with hardly a shot fired.

The game ended when the Pillbox, sorry Matilda in the middle finished off the final Italian Gun and the British objective was complete, but not without considerable losses which were pushing 50% at game end.
So points wise I am going to give the Italians one (for the High casualties) and 3 to the British giving a Campaign Total of 18 to 10 in favour of the Brits.

Game 8 will be up soon, next time after a few games relying on the strength of the Matildas the British are back in the flimsy early Cruiser Tanks. But before then we will be playing on the fields of Edgehill and the Italian Wars Project will see the light of day again.

